 cuddle.fish
  about •
 disclaimers
 Today, we’re building a personal VPN that will block web advertisements, trackers, and malware. It will work on all devices, no matter where they are in the world. If you bring your own hardware, it’s completely free.
Let’s jump right in!
I’m going to preface everything with a basic context of site content, DNS, sinkholes, and VPNs. I promise you’ll be able to really understand how this project works. If nothing else, this knowledge is super useful!
When you visit a website, you have to download its content. Sometimes, this content is critical for you being able to actually use the site, and other times it’s not.
Examples of this “unnecessary” content are advertisement images, visitor analytics scripts, or scripts that collect personal data about you. Sometimes this unnecessary content is straight up malicious. Scripts might try to download malware onto your computer and trick you into installing it.
You don’t need to be on a “bad” website to be infected either— malware has been caught before embedded in advertisements hosted on sites of reputable companies.
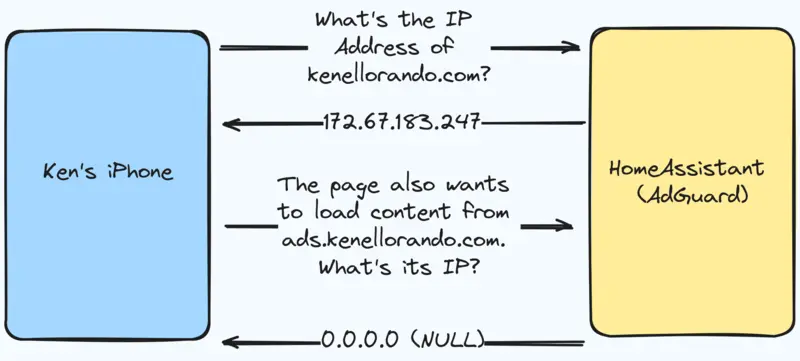
Domain names like kenellorando.com are meant to be read by humans, not machines. For a computer to be able to use it, it must discover a corresponding IP address, a unique numerical identifier that is linked to the domain name. In our example, kenellorando.com will “resolve” to 172.67.182.247.
If your computer or home router doesn’t know what the IP address of a domain is, it will look it up by asking servers available to the general public. These servers are often hosted by companies like your ISP, Google, or Cloudflare.
This lookup and translation of domain names to IP addresses happens in the background and is called Domain Name System— DNS. This is often likened to searching for a name in a phone book to discover a phone number.
The problem? Any website can make additional calls in the background to other websites to download unnecessary or malicious content. For example, kenellorando.com might call ads.example.com to serve advertisements. ads.example.com would also be looked up through DNS like any other domain, and the content it serves would usually be returned to your computer without question.
One solution to prevent such content from loading is by deploying a DNS sinkhole. Rather than always allowing our computers to look up the IP addresses of any domain, we can custom-build filters to block domains known to host advertisements, trackers, or malware.
That’s what AdGuard does. AdGuard is software loaded with a list of over 40,000 domains that the community believes to be unwanted, intrusive, or malicious. If we installed AdGuard to a server and explicitly configured our computers to perform DNS with it, AdGuard would discard any request made to a domain on the list.
As a result, computers using an AdGuard DNS sinkhole would simply be unable to load the potentially unwanted content from those domains.
Without going too much into detail, a DNS sinkhole should only be used by your own devices at home and not by the general public, for security purposes. When you keep the sinkhole private to your home, your laptop in the same household network can use it, but not if you were on public Wi-Fi in a far-away cafe.
That’s what a VPN is for. A VPN allows devices far away from each other to create secure communication tunnels so they may exchange data safely as if they were physically connected. It’s effectively extending a network far beyond its physical limits— Virtual Private Network.
If we installed VPN software on both our sinkhole at home and our laptop at the cafe, we would in theory be able to utilize AdGuard’s filtering no matter where we took the laptop.
Okay, so why not just install VPN software to each device? This would work, but managing VPNs by hand is more complicated than you might think. It’s not “one-click” simplicity. It’s doable but the complexity quickly piles up and becomes tedious if you have a lot of devices to manage.
This is where Tailscale comes in. Tailscale is a service that activates VPN software on any of your devices at the click of a button. Tailscale allows you to make secure, direct connections between any devices no matter how remote they are. It has apps available for all major desktop and mobile operating systems.
Tailscale provides another critical benefit: you can specify all of your Tailscale devices to use a specific DNS server at once, without needing to manually configure them one at a time. This means you could set your devices with Tailscale to use your AdGuard installation for DNS filtering. It wouldn’t matter if you were at home or the cafe or another country, using your desktop or your laptop or your phone— all of your devices would block advertising, tracking, and malware traffic.
That’s what this project is building.
You are going to be astounded by this project’s simplicity.
Your requirements are:
I used the official Raspberry Pi Imager to write Home Assistant OS to a MicroSD. With the Imager, I don’t even need to provide the OS image. It’s available as an installation option at the click of a button.
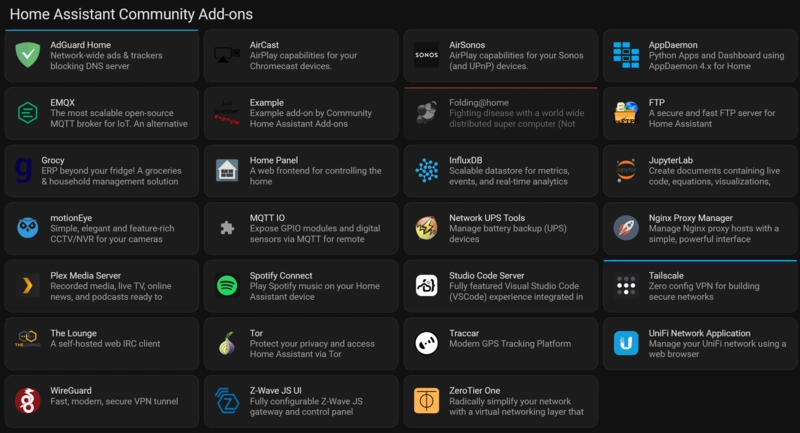
I’m using Home Assistant OS because it is possibly the easiest operating system to do this project on. It maintains AdGuard and Tailscale as click-to-install add-ons, and administration through a web UI.

Other specific-purpose OS→Home assistants and home automation→Home Assistant
Once the image is written, just put the MicroSD card into the Raspberry Pi and turn it on. That’s all. The Home Assistant OS installs itself to the machine without user input.
The device will present a web UI to administrate from, internally accessible at http://homeassistant.local:8123. You just need to create a new username and password at initial sign-in.
In the Home Assistant console, navigate to Settings → Add-ons → Add-on Store. Select AdGuard Home and Tailscale for installation.
Open the Tailscale add-on and authenticate in the UI using your Tailscale account. This should open a new window and add the node to your Tailscale network.
Your Tailscale Machines console should list the new homeassistant node— copy its IP address.

Copy the address under the IP column.
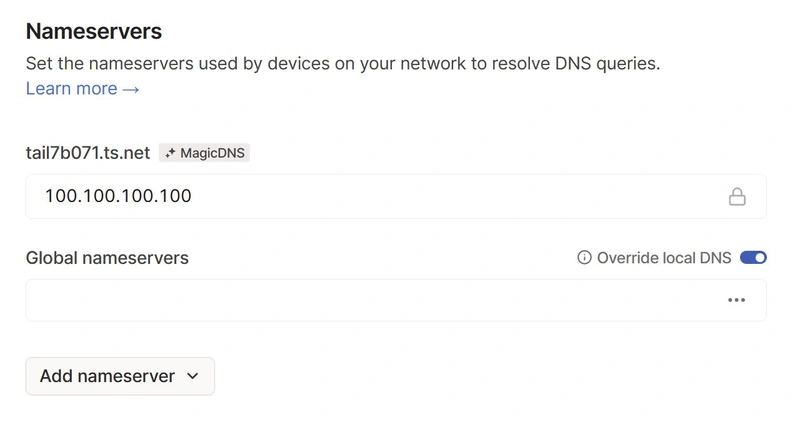
Switch to Tailscale’s DNS tab and select Add nameserver → Custom. Paste the IP and save. Once that’s done, be sure to enable Override local DNS with the switch on the right. This sets all of your Tailscale machines to send DNS requests to the node.
Add the address as a global nameserver.
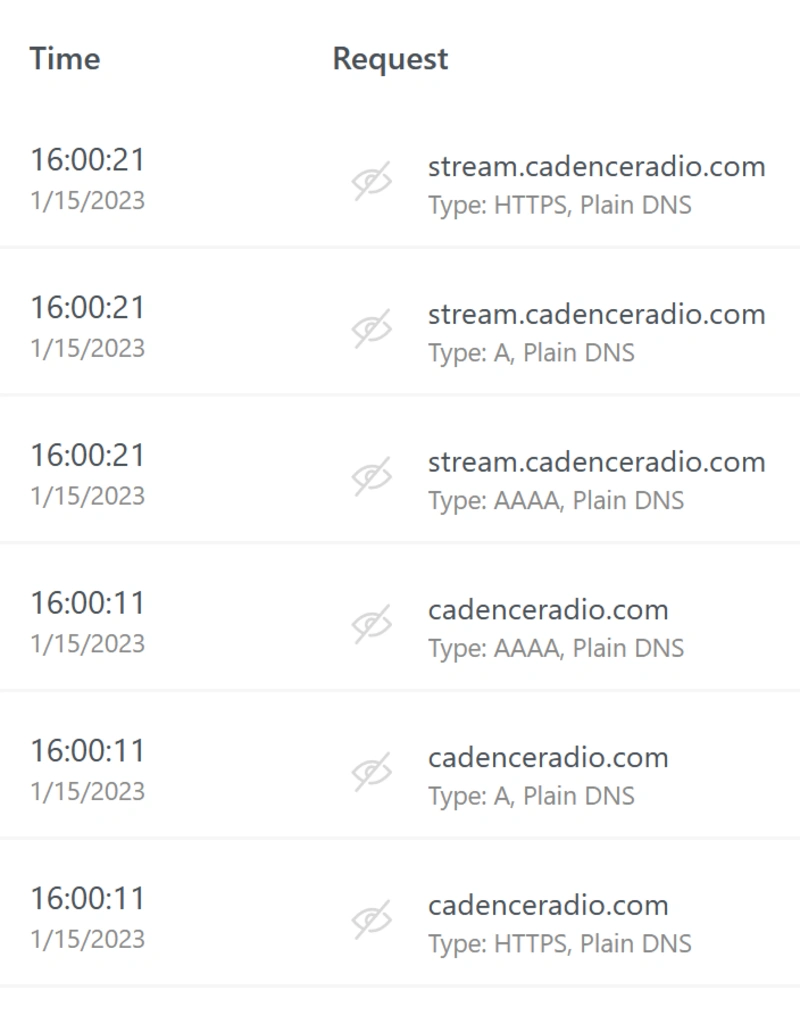
On my phone, while connected to a cellular network with Tailscale activated, I’ll connect cadenceradio.com, then check the AdGuard console, which should show DNS requests for the site coming through.
For one more test, let’s connect to some ad-infested website, like msn.com, and verify that the ads are being caught.
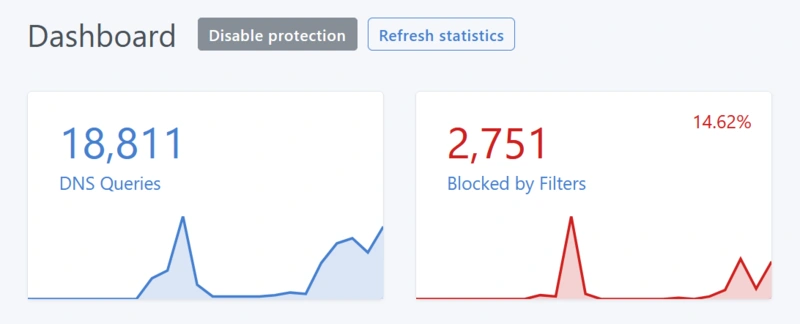
Devices connected to my Tailscale network will route DNS to the AdGuard device. AdGuard’s default list filters out advertisements, trackers, and malware.
In a situation where the node becomes unreachable (home network outage, power failure, thing just crashes), DNS will not resolve for my Tailscale devices until it becomes available again.
Home Assistant OS has a watchdog agent that should relaunch AdGuard and Tailscale in an event like this. Still, if I really had to revert back to “normal” DNS in a hurry I would:
In the long term, it might make sense to run AdGuard on a second node, like a private nameserver in the cloud. We’ll see if it becomes necessary.
My home network has an “upper” network behind an internet facing router, and a “lower” network behind another router facing the first one. The two networks do separate NAT.
I originally tried to set this up on the lower network, but found that Home Assistant OS fails to pull containers, meaning it will be unable to install itself or any add-ons. Additionally, if you move a working node from the upper network to the lower one, all DNS becomes very slow (but still works). It might have been fixable, but I decided not to investigate further and just moved the Pi to the first network.
This was my first project using Tailscale, and I was astonished at how useful their product is.
There’s a lot more that Tailscale makes easy that I didn’t even mention here:
I’m just getting started with it. I hope to eventually use Tailscale more.